
Superweapons Notes
Table of Contents
- Section 1: Introduction
- Section 2: Superlasers
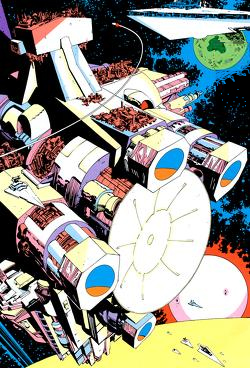
- Section 3: World Devastators
- Section 4: Planet Killers
- Section 5: Star Destroyers
- Section 6: Force Weapons
Section 2: Superlasers
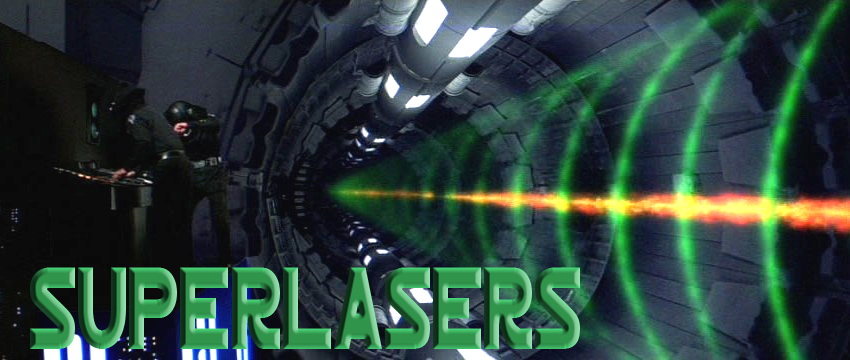
Some of the most infamous superweapons in the galaxy use massive superlasers to annihilate their targets. A single beam generator can sear continents and reduce the largest Star Dreadnoughts to dust. Multiple beam generators combine to destroy seditious worlds, with each blast of the superlasers unleashing more firepower than half the Imperial fleet. These weapons require the immense power of titanic hypermatter reactors and dozens of gunners just to operate.
 The Death Star design was first conceived by
Raith Sienar as the Expeditionary Battle Planetoid, an exploratory
vessel containing vast armies intended to conquer the unknown
regions. Then-Captain Tarkin saw this as an opportunity to
further his goals, and presented the idea to Supreme Chancellor
Palpatine along with an early draft of what would become the famous
Tarkin Doctrine. Palpatine passed the plans along to Count Dooku,
who had the design reworked into an immense battlestation by Geonosian
engineers. It was these insectoid geniuses who first conceived of
a "superlaser" weapon.
The Death Star design was first conceived by
Raith Sienar as the Expeditionary Battle Planetoid, an exploratory
vessel containing vast armies intended to conquer the unknown
regions. Then-Captain Tarkin saw this as an opportunity to
further his goals, and presented the idea to Supreme Chancellor
Palpatine along with an early draft of what would become the famous
Tarkin Doctrine. Palpatine passed the plans along to Count Dooku,
who had the design reworked into an immense battlestation by Geonosian
engineers. It was these insectoid geniuses who first conceived of
a "superlaser" weapon.
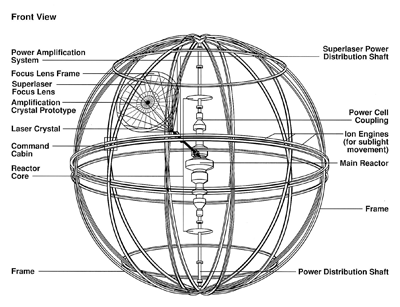
Unknown to the rest of the galaxy, Tarkin covertly diverted funds from the first Death Star's construction to build a prototype at his secret Maw Installation. It was there that Bevel Lemelisk, Tol Sivron, and others first paired the superlaser with the immense frame of Seinar's Battle Planetoid design. The Prototype Death Star consisted of the superlaser, sublight engines, the main reactor, and a small control room. The rest of the battlestation was unfinished, leaving the skeletal frame exposed to vacuum. Only the cannon well was complete and recognizable as belonging to a Death Star. The Maw Installation design team used this vessel to correct flaws in the Geonosian design and conduct proof-of-concept trials. Armed with this knowledge, Tarkin and chief engineer Bevel Lemelisk departed for the prison planet Despayre to implement what they learned. This fully operational prototype was destroyed by one of the black holes surrounding The Maw Installation in 11 ABY, while pursuing Han Solo and Kyp Durron.
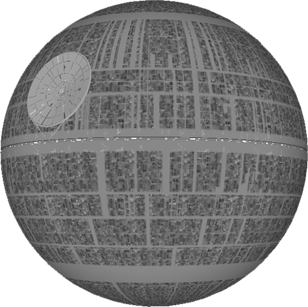 The first Death Star is best known for
destroying Alderaan, reducing that rebellious world into the asteroid
field now known as The Graveyard, but the first test-firing of its
superlasers occurred earlier when it destroyed the prison planet of
Despayre. To maintain secrecy, all the slave laborers were
annihilated after
completing the battlestation. Commanded by
Grand Moff Wilhuff Tarkin himself, this moon-sized battle station
epitomized terror and subjugation. Over 20 years in the making,
the first Death Star measured 160 kilometers in diameter.
Armament included:
The first Death Star is best known for
destroying Alderaan, reducing that rebellious world into the asteroid
field now known as The Graveyard, but the first test-firing of its
superlasers occurred earlier when it destroyed the prison planet of
Despayre. To maintain secrecy, all the slave laborers were
annihilated after
completing the battlestation. Commanded by
Grand Moff Wilhuff Tarkin himself, this moon-sized battle station
epitomized terror and subjugation. Over 20 years in the making,
the first Death Star measured 160 kilometers in diameter.
Armament included:
- Eight individual superlasers combined to form a single beam.
- 5000 Turbolaser Batteries.
- 5000 Heavy Turbolaser Batteries.
- 2500 Ion Cannons.
- 2500 Laser Cannons.
- 768 Tractor Beam Projectors.
- Approximately 8000 TIE Fighters.
The Death Star was divided into 24 zones, with all armament except the superlaser split evenly between them, thus an attacking craft would only come under the fire of several hundred weapons at once, rather than the entire arsenal. A 503 km equatorial trench further divided the Death Star, containing most of the hangar and docking bays, tractor beam emplacements, drive thrusters, and sensor arrays.
Given the immense size and firepower at his disposal, historians marvel that Grand Moff Tarkin only dispatched a handful of the thousands of TIE Fighters at his command to deal with the attacking Rebel squadrons. Most agree that the late architect of the Tarkin Doctrine and his battlestation would have survived, had he only taken the Rebel's attack seriously. Despite its impressive array of weapons, the first Death Star contained a fatal flaw: a 2 meter thermal exhaust port connected to the main reactor. Rebel spies managed to steal the Death Star Plans and smuggled them via the droid R2-D2. The detailed schematics allowed Rebel leaders to plan Luke Skywalker's famous Trench Run. At the culmination, Skywalker fired two proton torpedoes into the exhaust port, destroying the Death Star and all aboard her.
 After the first Death Star's
destruction, the Empire needed to counteract the rapidly-growing
momentum of the Rebel Alliance. Rather than wait for a new
superweapon or the time required to construct another Death Star, an
Imperial research facility on Naboo miniaturized the original
Hammertong technology, the Imperial code name for the superlaser
program. An Imperial-class star destroyer, the Conqueror,
was retrofitted to accept the superlaser and a larger reactor core,
then deployed to the Mustafar system 1 ABY.
After the first Death Star's
destruction, the Empire needed to counteract the rapidly-growing
momentum of the Rebel Alliance. Rather than wait for a new
superweapon or the time required to construct another Death Star, an
Imperial research facility on Naboo miniaturized the original
Hammertong technology, the Imperial code name for the superlaser
program. An Imperial-class star destroyer, the Conqueror,
was retrofitted to accept the superlaser and a larger reactor core,
then deployed to the Mustafar system 1 ABY.
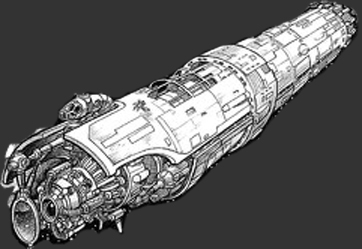
Under the command of Admiral Victor Strang, a former Storm Commando, the Conqueror was tasked with locating and destroying Rebel bases around the galaxy. While purported to have the planet-shattering capability of its immense predecessor, the 1.6 km size of the star destroyer was simply not large enough to accomodate firepower of such magnitude. It is more likely the Conqueror's superlaser could only destroy a small moon, as demonstrated during its test-firing above Mustafar.
Prior to her maiden voyage, Rebel saboteurs assigned to Renegade Squadron infiltrated the Conqueror and planted explosive charges around her main reactor. Despite the presence of Admiral Strang, a contingent of Storm Commandos, and Lord Vader himself, the Rebels destroyed the new vessel and escaped.
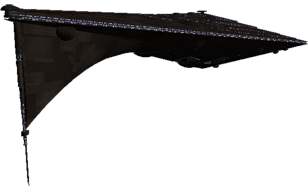
 Losing the first two superweapons
to the Rebel Alliance enraged Emperor Palpatine. He ordered the
construction of multiple superweapons, tasking Bevel Lemelisk with
constructing not only a second Death Star, but a prototype vessel for
incorporating a true superlaser into a Star Dreadnought. This
prototype was constructed above Hockaleg and christened The Tarkin
in honor of the late Grand Moff. After eliminating the fatal
exhaust port flaw, Lemelisk set about stripping the technology to its
essense, inspired by the prototype Death Star. The resulting
vessel, while still immense, was much smaller due to its strict
utilitarian nature and technological refinements from the first Death
Star iteration.
Losing the first two superweapons
to the Rebel Alliance enraged Emperor Palpatine. He ordered the
construction of multiple superweapons, tasking Bevel Lemelisk with
constructing not only a second Death Star, but a prototype vessel for
incorporating a true superlaser into a Star Dreadnought. This
prototype was constructed above Hockaleg and christened The Tarkin
in honor of the late Grand Moff. After eliminating the fatal
exhaust port flaw, Lemelisk set about stripping the technology to its
essense, inspired by the prototype Death Star. The resulting
vessel, while still immense, was much smaller due to its strict
utilitarian nature and technological refinements from the first Death
Star iteration.
In 3 ABY Grand Admiral Martio Batch tasked the Tarkin with destroying Aeten II. The superlaser smashed the abandoned mining world, releasing vast numbers of previously untapped stygium crystals, vital to the cloaking technology found in the TIE Phantom. Learning of another superlaser platform, the Rebel Alliance tasked Princess Leia, Chewbacca, Luke Skywalker, and the droids C-3PO and R2-D2 with destroying the new battlestation.
Once aboard, the Rebels split up to sabotage the reactor core, tractor beams, and secure an escape pod. The sabotage was nearly averted when Lord Vader confronted Luke Skywalker above the main reactor, but Princess Leia Organa managed to reprogram The Tarkin's firing computer, creating a deadly feedback loop in the superlaser beam generators. The so-called Heroes of Yavin escaped, but the Tarkin was destroyed by its own superlaser when it attempted to fire on their vessel.
 Undaunted by the utter failure of
the first three superlaser projects, construction of the Second
Death Star continued above the forest moon of Endor. This
behemoth was the largest of the Imperial Superweapons, measuring 900 km
in diameter. The final design called for the following armaments,
divided among 24 zones as in the first Death Star:
Undaunted by the utter failure of
the first three superlaser projects, construction of the Second
Death Star continued above the forest moon of Endor. This
behemoth was the largest of the Imperial Superweapons, measuring 900 km
in diameter. The final design called for the following armaments,
divided among 24 zones as in the first Death Star:
- Improved Superlaser
- 15,000 Turbolaser Batteries
- 15,000 Heavy Turbolaser Batteries
- 2500 Anti-Ship Laser Cannons
- 5000 Anti-Starfighter Laser Cannons
- 5000 Ion Cannons
- 768 Tractor Beam Projectors
Superlaser improvements included a faster recharge time, variable power levels, and more finely-tuned targeting computers enabling the obliteration of capital ships, as demonstrated in the Battle of Endor.
Incorporating the lessons learned from the previous platforms, Bevel Lemelisk dispersed the single thermal exhaust port into millions of millimeter-wide heat dispersion vents, each equipped with baffling to prevent destructive energy feedback from blaster or torpedo strikes. After achieving this marvel, the scientist boasted to the Emperor that "Once completed, this battlestation will be invincible!" Apparently Palpatine believed him, because he deliberately leaked the existence, location, and detailed plans of the new Death Star to the Rebel Alliance. While intending to lead the Rebel Fleet into a decisive battle and crush them forever, the tables were turned by the so-called Heroes of Yavin once more. Leia Organa, Han Solo, the Wookiee Chewbacca, and the droids R2-D2 and C-3PO, led a Rebel commando team to sabotage the shield generator protecting Endor and the Death Star II. This enabled Wedge Antilles and Lando Calrissian's successful attack on the battle station's main reactor, destroying the Death Star II.
Just before the battlestation's destruction, Emperor Palpatine was betrayed by Lord Darth Vader and hurled down a reactor shaft to his death. Once more, the Rebel attackers escaped relatively unscathed. With the Emperor dead and the Death Star destroyed, the Empire quickly collapsed, leading to the eventual formation of the New Republic.
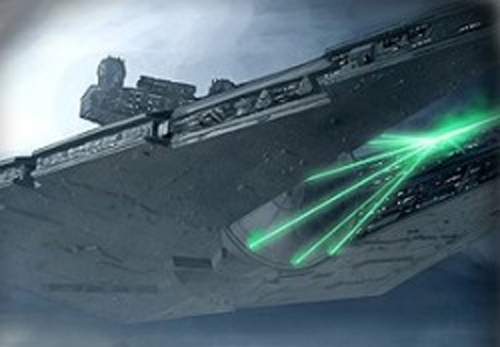
The Emperor's personal flagship, Eclipse, began construction shortly after the Battle of Yavin. At 17.5 km in length, it and its sister ship, Eclipse II, were among the largest star dreadnoughts ever constructed by the Empire. Boasting a single axial superlaser capable of searing continents and penetrating a planet's crust, the jet black vessel was truly fearsome to behold.
The Eclipse was first functional 4 ABY, when it was hijacked by the crime lord Tyber Zann who used the superlaser to destroy the Super Star Destroyer Annihilator. Unable to fully crew the incomplete vessel, Zann left it adrift outside the Kuat system where it was quickly recovered.
The immense vessel vanished into the Deep Core for several years, emerging above Byss under the reborn Emperor's command. Now fully operational, the vessel's armament included:
- Axial Superlaser
- 550 Heavy Laser Cannons
- 500 Turbolasers
- 75 Ion Cannons
- 100 Tractor Beam Projectors
- 10 Gravity Well Projectors
- 58 Starfighter Squadrons
The Eclipse's hull and shields were reinforced to such a degree that the vessel sustained no damage after repeatedly ramming enemy capital ships, its immense prow literally cleaving star destroyers in two.
Despite these impressive statistics and the ability to wipe out entire sector fleets, the Eclipse was not immune to the power of the Force. Jedi Leia Organa-Solo and Luke Skywalker disrupted the reborn Emperor's control of a Force Storm he created to destroy the New Republic fleet above Da Soocha. Unguided, the Force Storm's titanic energies consumed the Emperor and the Eclipse, leaving no trace of either.
Lacking the nearly unlimited resources enjoyed at the height of the Empire, Palpatine's Remnant was unable to build more Eclipse-class dreadnoughts. Instead they constructed the 15 km Sovereign. Slightly smaller and slower than its predecessor, the Sovereign-class is still more than capable of inflicting massive destruction. Armaments include:
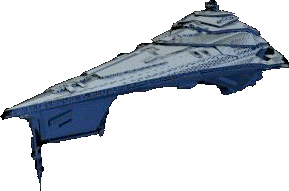
- Axial Superlaser
- 500 Turbolaser Batteries
- 500 Heavy Turbolaser Cannons
- 75 Ion Cannons
- 100 Tractor Beam Projectors
- 5 Gravity Well Projectors
- 42 Starfighter Squadrons
Before the Emperor's final defeat in 11 ABY, he granted command of the Emperor's Hammer Strike Fleet and its flagship, the Sovereign, to Grand Admiral Ronin. Dispatched to the Minos Cluster, GA Ronin wrested the current EH Territory from New Republic hands. While our organization maintains the galaxy's only surviving superlaser, current EH doctrine prohibits its use against civilian populations.
 After learning of the Emperor's
rebirth, Bevel Lemelisk fled to avoid Palpatine's favorite punishment
for the engineer: summary execution. After seven deaths and
subsequent clone resurrections at the Emperor's hands, Lemelisk left
the Empire and New Republic behind, ending up in the employ of Durga
the Hutt. Durga's agents liberated some of the Death Star plans
from the Imperial Palace and in Lemelisk Durga found not only a willing
pawn, but the key to his dreams of extorting protection money from the
entire galaxy. Drafting his most efficient superlaser design,
Lemelisk produced plans for the Darksaber. Stripped of
most hangars, turbolaser defenses, and living quarters, the Darksaber
was essentially a flying turbolaser with room for hundreds of Hutts.
After learning of the Emperor's
rebirth, Bevel Lemelisk fled to avoid Palpatine's favorite punishment
for the engineer: summary execution. After seven deaths and
subsequent clone resurrections at the Emperor's hands, Lemelisk left
the Empire and New Republic behind, ending up in the employ of Durga
the Hutt. Durga's agents liberated some of the Death Star plans
from the Imperial Palace and in Lemelisk Durga found not only a willing
pawn, but the key to his dreams of extorting protection money from the
entire galaxy. Drafting his most efficient superlaser design,
Lemelisk produced plans for the Darksaber. Stripped of
most hangars, turbolaser defenses, and living quarters, the Darksaber
was essentially a flying turbolaser with room for hundreds of Hutts.
Durga chose the Hoth asteroid belt as the Darksaber's secret construction site, and Lemelisk designed automated Mineral Exploiters to harvest and convert needed materials from the surrounding rocks. Despite the advanced design, the project was doomed to failure by cost-cutting measures and shoddy workmanship. In the most extreme case of saving money, the computer cores intended to run the immense vessel were orginally designed to manage sewer systems. Fleeing a New Republic fleet, the Darksaber attempted to fire its superlaser, which fizzled. The subsequent power drain left the vessel adrift until it was crushed between two large asteroids, killing everyone aboard. Anticipating the disastrous test-firing Bevel Lemelisk escaped prior to the superlaser's activation and was quickly apprehended by New Republic forces. Four years later he was executed one final time, for the crime of genocide.